Friday, December 31, 2010

Top 10 Layouts of 2010

I completely lifted this idea from another blog site... but I think it is just a grand project.
I've picked my top 10 layouts made in 2010! Whew... that was a lot of layouts to sort through... haha.

In no particular order.....

I'm one of the few people in my crop group that does layout that are non-family photos... I just love this layout, the colors, the image and all the embellishments were just perfect!


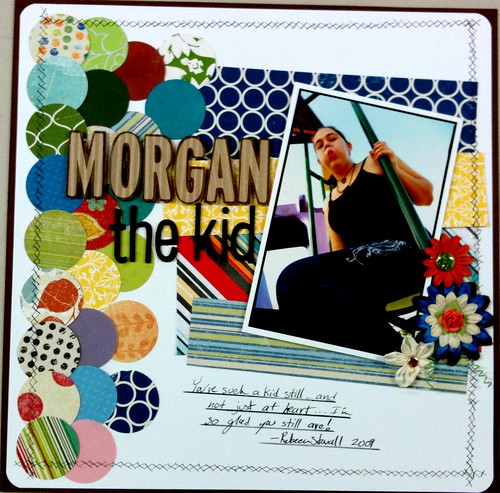
This layout uses circles in a great way. And I always love my butterflies!


The colors on this were inspired by a color challenge but ended up being so wonderful for this shot of me and my hubby!


This layout is just fun... and I've used this trick with hidden journaling (behind the large pic of the monkey) several times. I always love the results.


This layout was just a ton of fun to use up many scraps - each circle was from a scrap!


This was a odd layout at first for me, but it really grew on me. I love how I was able to use some odd embellishment combos that really seemed to work together.


This simple layout is just really pleasing to the eye. I got to use up some great papers and old travel embellishments to document this thought & moment.

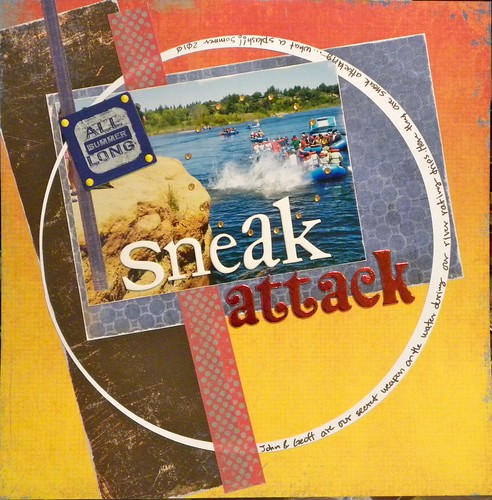
Sneak Attack
Little Yellow Bicycle and BoBunny always inspires some great layouts with their awesome paper!


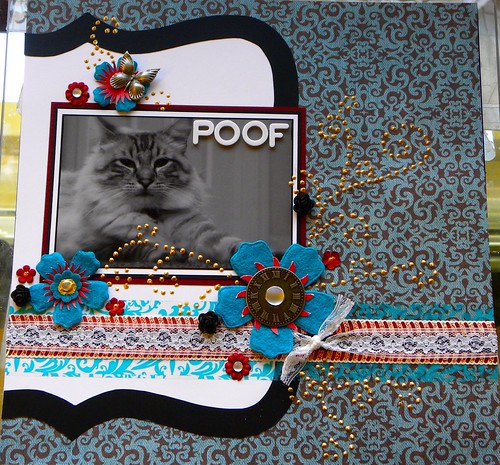
Put orange on it and it is likely to be at the top of one of my lists... plus I just love the image of Poof too!

Likely because it is recent... but I love the colors used on this.

Hope you enjoyed!

P.S. take a look back and try to find the layouts without butterflies! I sneak them in there all the time. :D

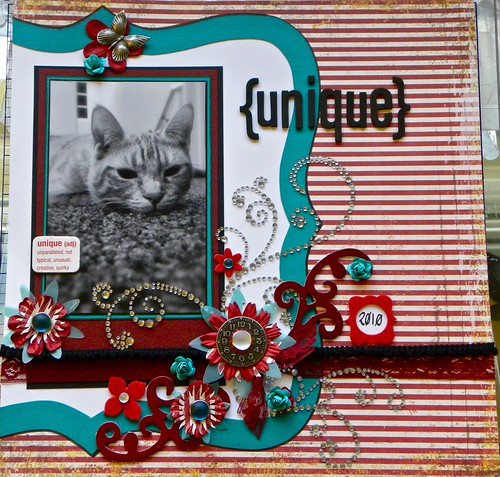
Unique

Oh! I love this layout! The capture of Ryu is super cute and I just love the paper and the color combo... I could go on and on!

Color combo is provided by a past challange #17 from ColourQ.


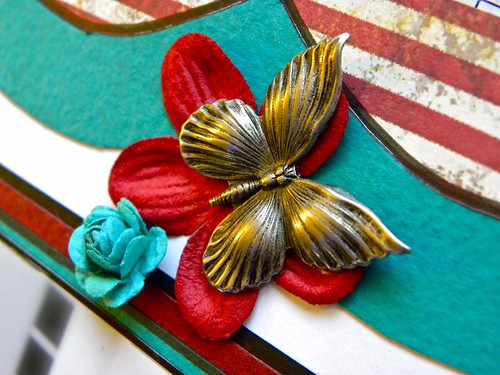
Detail Shots.
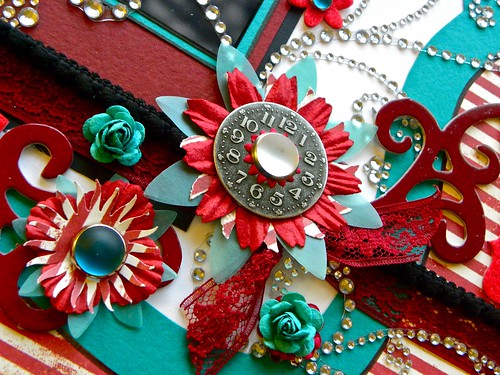
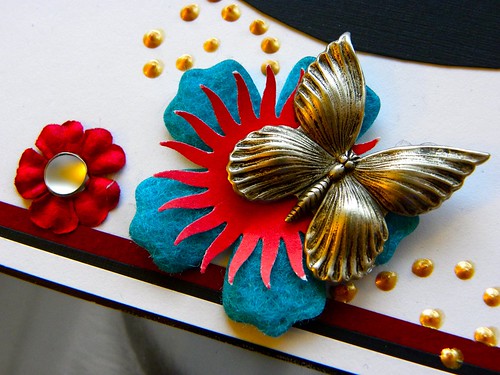
This butterfly is gorgeous, I got several of them at a garage sale and have no idea of the manufacturer, if anyone knows feel free to leave a comment.
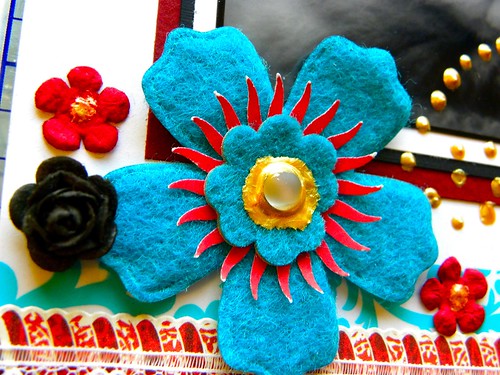
Oh Prima Roses... my new fav! They do add a bit of dimension but I love them so much... how many more colors can I get!

And the collection of layered embellishments! After completing the page it was a little weighty but how pretty!
Products Used:
  • Cardstock: teal, white, black and brick red
  • 7Gypsies - Barcelona Paper: Catalonia
  • Ribbon: Sm pom-pom in black & brick red lace
  • Various manufactures flowers (including Prima roses)
  • Recollections Rhinestone stickers
  • Unknown manufacture - chipboard definition "unique," drk red flourishes, and metal butterfly
  • Various manufacture brads
  • Zig Calligraphy pen: black
  • American Craft felt peices
  • American Craft Thickers: Daiquiri black

Thanksgiving - Another Copy


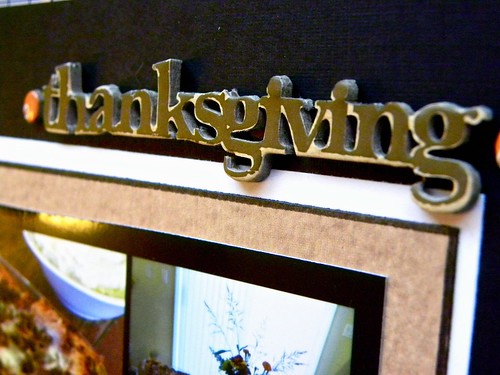
I just love doing collage prints recently. I always take a million pictures and this is a great way of using them. This layout is perfect too! Here is the original I scraplifted myself again!!
Although I think I like the color combo of the original... this is still a great layout that was a quick and easy way of getting those thanksgiving photos done!

Detail Shots:
So one of the bad things about digging out all the products I have is that I discover ones that I love and want to use...but for the life of me cannot remember where I got them. For two reasons this is frustrating... 1) I like to document what I used...for myself, contests and for all thost that might read my blog... so if you want you can get it too, and 2) because I cannot go and get more. I want to use my product but when I really like it I like to use it again and again... *le sigh*

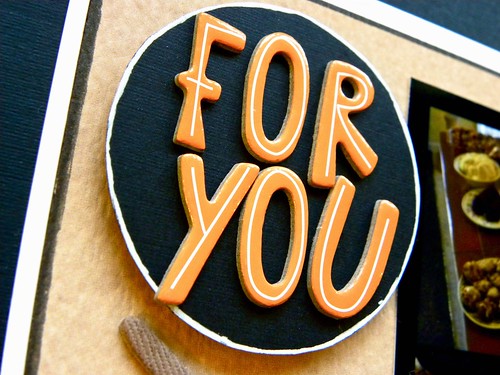
Cute new font that I've used twice now (first time on the Poof & Lights layout). This is American Crafts Thickers - Bones. Did I mention yet how excited I am about the 10 e's that come in the package!!! WHOOOOO HOOOO! I always run out of e's and normally buy two packages of fonts because of this. I love you American Crafts Thickers!!

Products Used:
  • Cardstock: black, white and craft (tan)
  • American Crafts Thickers: Salutations Fabric Brown & Bones Glossy (chipboard) Orange
  • Zig Calligraphy pen: black
  • Signo white pen
And you know it is a pretty simple layout and fast to assemble when the product list is only 4 bullets!

Poof - a copy


I recently created a really fun layout that I needed to scraplift from myself! Here is the result.
It didn't turn out as nice as the original, but still pretty nice.

Detail shots:
This butterfly is gorgeous, I got several of them at a garage sale and have no idea of the manufacturer, if anyone knows feel free to leave a comment.
If you cannot tell I sort of used the Ranger Liquid Pearls everywhere!

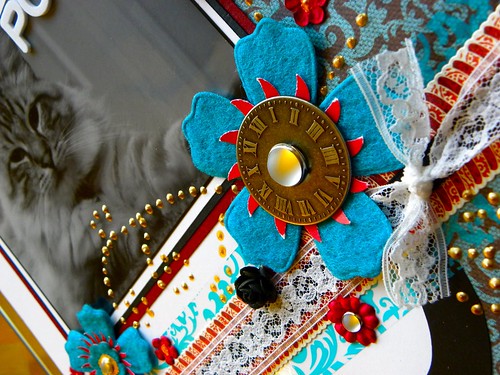
And my scrap buggies ask it too... what is with all the clocks on my layouts... The answer: Honestly, I just like them... why do I put flowers on layouts about cats?!? HAHA...
Products Used:
  • Cardstock: white, brick red, and black
  • K&Company Tim Coffey Designer Paper Pad
  • Various manufacturers flowers (including some Prima roses, American Crafts, etc)
  • Tim Holtz, Ranger: Liquid Pearls - Gold Pearl
  • Tim Holtz Metal Accents - clock and coin
  • Basic Gray Boxer Collection - Chipboard sticker/boarders
  • Med black ribbon & med white lace
  • Brads of various colors
  • Unknown manufacturer decretive packing tape
  • American Crafts Thickers: Fantastic Foam White
  • Unknown manufacturer metal butterfly
  • Zig Calligraphy pen: black

Wednesday, December 29, 2010

Creative Scrappers Challenge # 136


Another Challenge! This time from Creative Scrappers... #136!
Totally fun to take my on view on this one!
Here is a bit more detail.

Products Used:
  • Cardstock: lt yellow, lt green, green, & blue
  • BoBunny Learning Curve Dot (flip side)
  • Little Yellow Bicycle: Traveler - Ticket to Ride
  • Jillibean soup pattered paper
  • Basic Grey: Orgins - Sea Salt
  • October Afternoon, Night Light: Louie & Night Light
  • American Crafts Thickers: Fantastic Foam White & Honey Puffy Green
  • Zig Calligraphy pen: black

Final Dollies Challenge


Another layout inspired by the awesome color challenge at Design Dollies! Here is a submission for the last color challenge of 2010.

This layout was inspired by the colors:
ORANGE,
ROYAL BLUE,
TAN, &
CHOCOLATE

Detail shots:
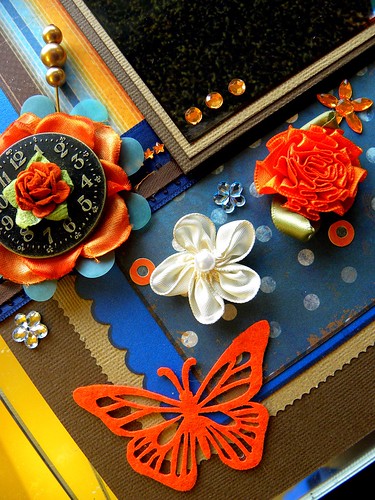
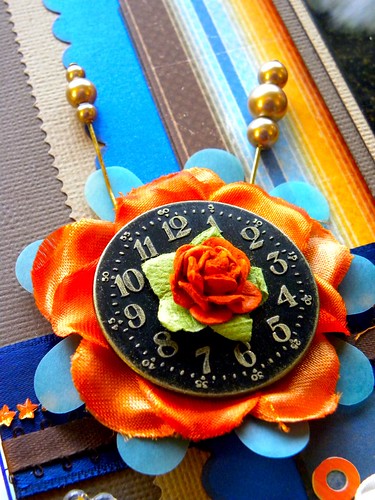
If it isn't already evident... I like layering... paper, flowers, different trims, ribbon, etc. The detail shot above I think shows some of the many layers of this piece.


Products Used:
  • Cardstock: chocolate & tan
  • DCWV the Shimmer Stack: blue
  • BoBunny Mama-Razzi-Dot
  • BoBunny Paradise
  • Tim Holtz Metal Accents - clock and coin
  • American Crafts Thickers: Fantastic Foam White & Bones Glossy (chipboard) Stickers
  • Various manufactures flowers
  • Various manufactures bling
  • Creative Impressions Felt Butterflies
  • Handmade pearl hat pins

Colour Q Challenge #65

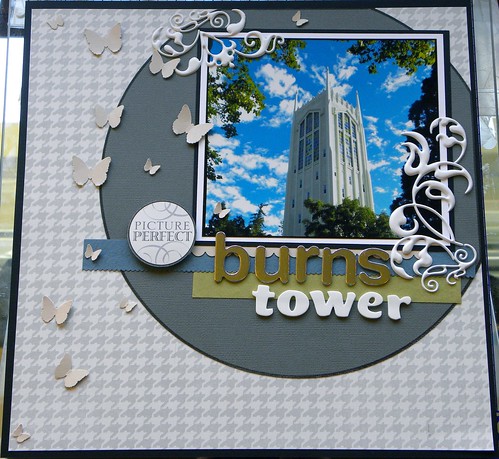
Inspired by browsing the Colour Q site ... I decided to play along with the latest challenge #65!
Here were the colors... pretty!

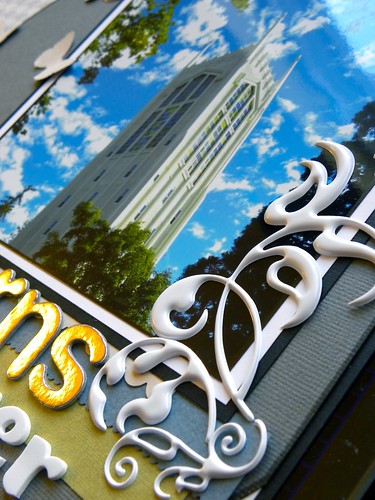
Here is a little detail on these fun puffy flourishes:

Products Used:
  • Cardstock: black, white, lt navy, olive, kraft (tan), and gray
  • Martha Stewart Butterfly punches
  • American Craft Thickers: Giggles Foam White & Cinnamon Foil Silver
  • Me and My Big Ideas Puffy Stickers: Elegant Flourishes
  • Colorbok: Patterned Paper, Stickers & Punch-out Pack - Midnight
  • Zig Calligraphy pen: black

Tuesday, December 28, 2010

Colour Q DT Call for Scrappers

OH! Yeah! I love the Colour Q Challenges!
Here are two past layouts that were inspired by color!

A creation for the ColourQ Challenge #20.
The colors in the images seemed to just work with this ColourQ Challenge.
To see full details of this previous posting click here.

The Colour Q Challenge # 13.
I missed the deadline for this one, but it is still a pretty layout!
To see full details of this previous posting click here.

If you have any interest here are some of my other Colour Q challenge submissions:
What fun it would be to design for this great Challenge site!

So excited, I think I need to scrap another challenge right now! Look for an additional post soon!

Cheers!

Sunday, November 28, 2010

Flowers from Ribbon

Flowers Together
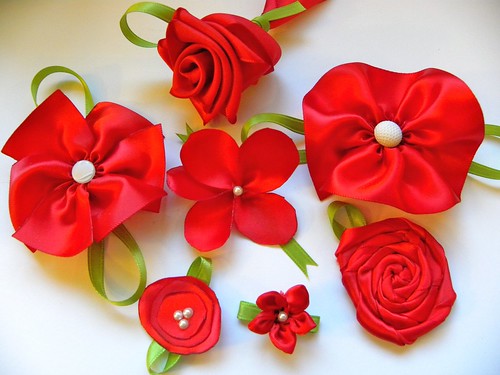
I'll be teaching a class soon that covers how to make a couple different types of flowers. I wanted to post this out there for all as a sneak peak. I've gone ahead and listed these flowers from least challenging to most challenging. I've also added a few tips below about what they might be used for and a couple notes from me about my experiences making them.

But first - what you will need if you want to make these flowers:
Needed Materials for flowers
The only materials you'll need for making these flowers are:
  • Scissors
  • Adhesive
  • Thick Ribbon (I used 1 1/2" red satin ribbon)
  • Thin Ribbon (I used 1/4" green satin ribbon)
  • Thread (doesn't really matter what color) and Needle
  • Lighter
  • Buttons or pearls (for centers of flowers)
The Easiest - the Basic Poppy Flower:
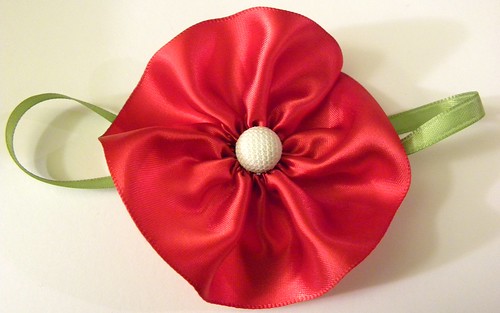
Poppy Flower
This poppy flower was the first I learned to make, by far the easiest. You just take a long strip of ribbon (I usually use 3-4 times as long as the width of the ribbon) and with needle and thread perform a running stitch along one side of the ribbon. Pull the thread tight so that the flower starts to gather and tie when it forms a tight enough circle. Place a center (like a button, brad, jewel, etc) in that covers the opening left from the gather. A green ribbon looped behind the flower act as "leaves." These work well on flat projects such as scrapbook pages and cards. P.S. The larger your running stitches are apart the thicker (more 3D) the flower will be.

Still Pretty Easy - The Child-Like Flower:
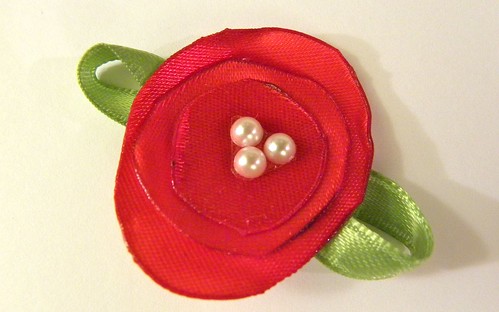
Child-Like Flower
This child-like flower looks a little more abstract then the others I've made before, but it goes together pretty fast and has a different look. Cut your ribbon in descending sized circles, I typically use three but you can go down to two or up to about 5 or 6 depending on how many layers (which look like petal layers) you'd like. After sealing the frayed edges of the petals (I use a lighter to burn the edges) you can start to assemble the flower. Just layer the circles with the largest on the bottom and up to the smallest on top. Add a center like these pearls and the green ribbon looped behind to make the "leaves." Perfect for flat projects and can be made pretty small in diameter. I learned there from a blog where the originator was making them so small they were post earrings!

The Mid of Ease - The Modified Poppy Flower:
Modified Poppy Flower
This modified poppy flower is very similar to the basic Poppy Flower. You take your long strip of ribbon (I usually use 4-5 times as long as the width of the ribbon) and cut it into 6 even sized pieces. Then with needle and thread perform a running stitch along one side of the different ribbon pieces, just like you did with the basic poppy. Pull the thread tight so that the flower starts to gather and tie when it forms a tight enough circle. The pieces of ribbon will overlap and form petals. Place a center (like a button, brad, jewel, etc) in that covers the opening left from the gather. A green ribbon looped behind the flower act as "leaves." These work well on flat projects such as scrapbook pages and cards. P.S. The larger your running stitches are apart the thicker (more 3D) the flower will be.

Getting a Little Harder - The Flat Rose:
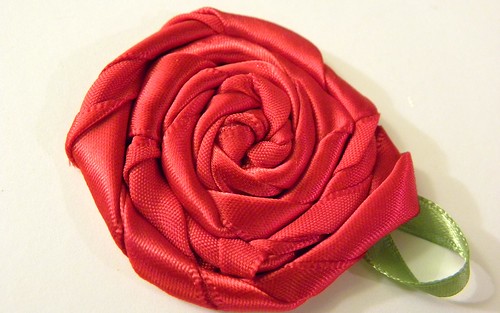
Flat Rose
I usually make this flat rose with a surface covered in a slow setting adhesive. You just twist the ribbon (or fabric, etc) and then create a flat spiral to form the shape of the rose. A small "leaf" made from green ribbon completes the look. These are work well for flat projects - like cards or scrapbook pages. P.S. I label these as a little harder mostly because of the tidiest part of getting the twist even... if you have uneven sized twists in the ribbon the flower will be lop-sided.

Somewhat Challenging - The Tropical Flower:
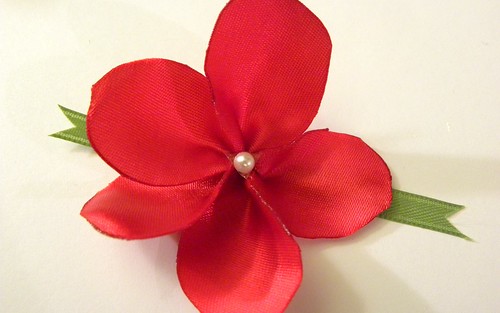
Tropical Flower
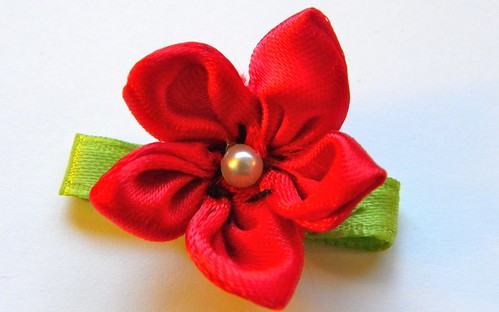
This tropical flower (sometimes called a hibiscus) requires a little bit more effort. First you take your ribbon and cut 5 petals that are tear shaped from the ribbon. After sealing the frayed edges of the petals (I use a lighter to burn the edges) you can start to assemble the flower. With needle and thread you stitch each pedal so the it folds in half and overlaps with the next pedal. after all the pedals are on the thread just tie the ends and correct any form issues. A green ribbon with simply cut ends forms the "leaves". Finishes the look with a small button or pearl in the center of the flower. These work well on semi-3D items and look very nice on barrettes and hair ties/bands.

Challenging - The 3D Rose:
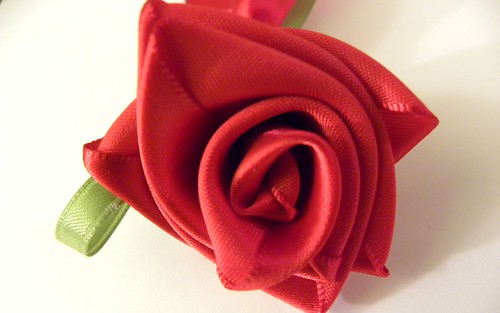
3D Rose
This 3D rose, although very pretty, definitely a little hard to make. These are made from a very long strip of ribbon (I typically make mine with at least 1' of ribbon to each 1" of width. The rose is made by folding the ribbon in a almost square pattern and then twisting the ribbon together to form the bud-like rose. The ends of the ribbon are then secured by stitching the base of the rose. Green ribbon is added to form the "leaf" and also stitched around the base to form the bottom of the rose. A stick or wire can be added to form the stem of the rose if desired. These roses are very 3D and are best given as "faux" roses or used in clothing or decretive hair items like burettes, etc. P.S. These roses are very difficult to make from ribbon less then 1/2" thick. Additionally, they look best with a silk ribbon (used here) but work best and are easier to make with a less smooth ribbon like just plain cotton.

Hardest and Most Challenging - The Full Flower
Full Flower
Okay, this is a bit of a hard bugger! I have actually included some drawings to describe how this is done... as it's a little hard to understand from just written instructions.
You will start with a circular template, I just use a punched-out circle of paper. The size of the circle will determine your flower's size. Fold the circle in half and cut it creating two half circles.
Fold each half circle piece into a quadrant with the wrong side out. Using straight stitches sew the straight side of the quadrant on the edge (a). Turn the piece right side out. Do the same for all six of them.
A&B Steps
Next sew on the curved side of each petal piece with a running stitch one at a time (b) as shown above. Space the stitches evenly as you will need to pull at the thread at one end to create the folds as show below. For each petal piece, secure the folds with ties before doing the same for the next petal. At the end of the sixth petal, attach it to the first petal to form the base of the flower.
C Step
D Step
E Step
P.S. Make another set of petals to use as a base - I suggest using contrasting colors. These can be the same size as the first set or different. Sew the smaller set on top of another. P.S. 2 The smaller the circle the harder these are... using the 1 1/2" ribbon I used the flower was quite small - as you can see compared to the other flowers shown.
Saturday, November 6, 2010

New Scrap Space

We recently moved and I've just finished putting my scrapbooking space together. I thought I'd share images of the space as I'm pretty proud of it!
Scrapbook Room
The scrap space is toward the back of the loft while there is a partial wall made by putting a bookcase and a large plant into the middle of the room. This separates the lounge/sitting area from the scrap space while still keeping a very open feel to the room.
Lounge
I added a second chair to my sitting area so I can have guest join me in my relaxed loft! The chairs are actually lawn furniture I saved and revitalized with a fresh coat of paint and cushions. Although not a room that is lacking natural light - it is pretty barren of built in lights so I've added several floor lamps and a task lamp as well as two paper stars I got in India that I modified into paper lanterns above the sitting area. Finally, in the seating area I added a couple 12" floating shelves that are perfect for showing off a couple pages.
Desk
My major desk space is a mirror surface. I like working on mirror as it is hard and easy to cut on (similar to glass cutting mats) and it is pretty easy to clean.
Tech Center
Everyone needs their tech center for the photo editing, music, research, etc. This side nook area fit an older desk perfectly and it's nice and out of the way. I've got all my cables for my computers, laptop, iPhone, iPad, cameras; my battery chargers; networking & wireless; etc. all in one place and easy to access.
I had some extra space above my equipment so I hung wires with clips so I can display more pages. It's very easy to switch them out as I create new pages.

If there is interest here is a link to my Flickr slideshow of the additional pictures.

Cheers!